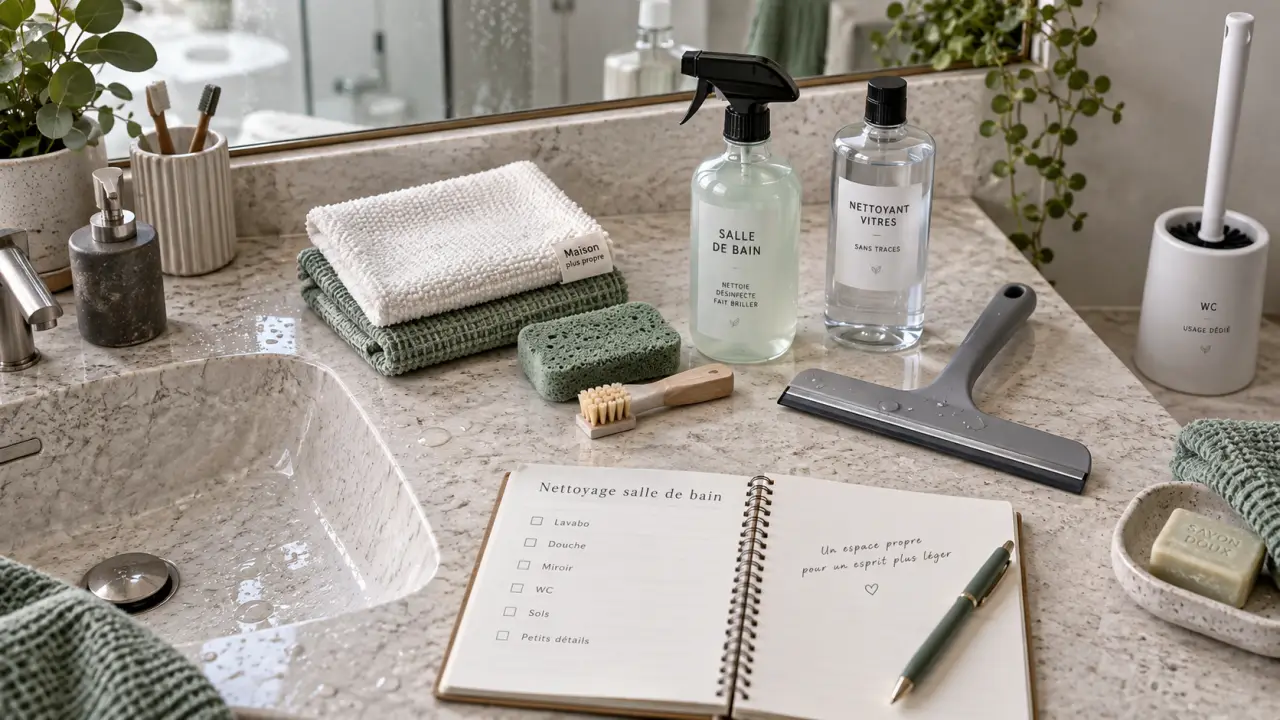
A bathroom is easier to clean when you follow a clear order: remove dry debris first, let products sit on areas with buildup, then work from cleaner surfaces to dirtier ones. This keeps dust from turning into sticky residue and prevents you from cleaning the same area twice.
1. Gather a small, surface-safe cleaning kit
You do not need a cupboard full of products. A practical kit includes microfiber cloths, a non-abrasive sponge, a toilet brush, a small detail brush, a squeegee, an all-purpose cleaner, glass cleaner, and a disinfectant. Keep separate cloths for the toilet and for the sink, shower, and mirrors.
| Task | Best tool or cleaner | Important precaution |
|---|---|---|
| Mirrors and glass | Glass cleaner and lint-free microfiber cloth | Use a light spray to avoid streaks. |
| Sink, tub, and shower | All-purpose cleaner and non-abrasive scrubber | Check that the product suits stone, acrylic, or enamel. |
| Toilet bowl | Toilet cleaner and dedicated toilet brush | Never use the brush on other surfaces. |
| Mineral deposits | Distilled white vinegar | Do not use vinegar on natural stone. |
Never mix cleaning products. Bleach must not be combined with vinegar, ammonia, or toilet cleaner. Ventilate the room, wear gloves if your skin is sensitive, and follow each product label. Surface compatibility matters too: a cleaner that works on glass or enamel may damage stone, acrylic, or other delicate finishes.
2. Start dry, then clean from high to low
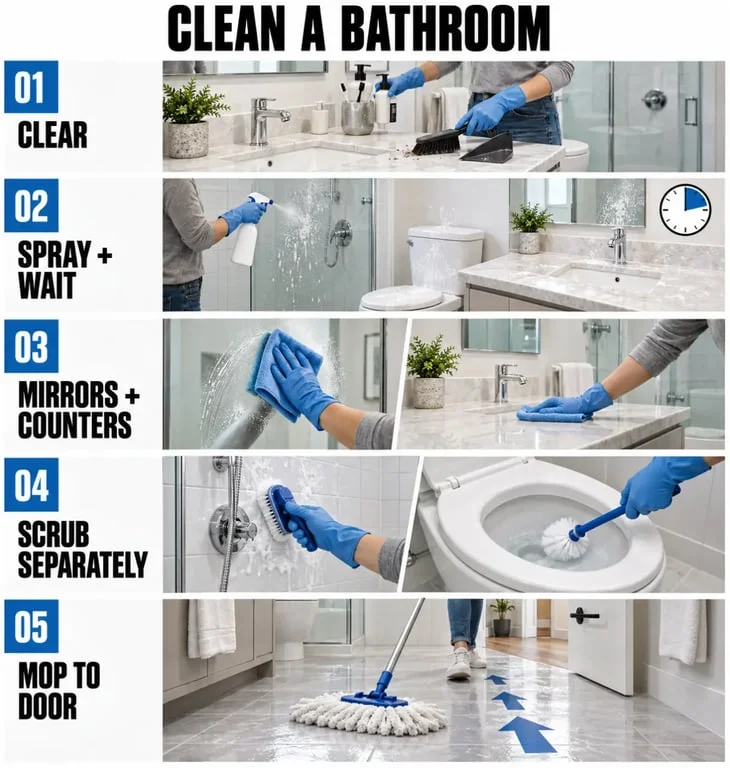
Open a window or run the extractor fan. Remove towels, bath mats, bins, and countertop items. Shake out or vacuum the mat outside the bathroom. Then dust light fixtures, shelves, ledges, vents, baseboards, and the floor before using liquid cleaners.
This dry-first step matters because hair, lint, and dust can turn into a paste when mixed with cleaner. Once the room is clear, spray the shower walls, tub, sink, and toilet exterior. Let the cleaner work while you clean the mirrors and counters. Giving the product a few minutes of contact time loosens residue and reduces scrubbing without adding work.
Always work from high surfaces toward low ones. Dust that falls from a shelf or ledge can then be removed from the floor at the end rather than landing on an area you have already cleaned.
3. Make glass, counters, and fixtures look fresh
Mirrors and shower glass
Spray cleaner onto a microfiber cloth instead of soaking the surface. Wipe from top to bottom, then buff with a dry part of the cloth. A lint-free cloth helps prevent new fibers and streaks from being left behind.
For glass shower doors, use a squeegee after rinsing. This removes the water film that causes hard water marks and soap scum. If the glass is heavily coated, allow a suitable bathroom cleaner to sit first, following the product label, then rinse before using the squeegee.
Countertops, faucets, and the sink
Clean the counter before the basin so crumbs, hair, and residue can fall into the sink and be rinsed away. Wipe faucet handles, soap dispensers, cabinet pulls, and light switches carefully. These high-touch areas collect residue through daily use.
Then scrub the sink, rinse it well, and dry the tap with a clean cloth for a streak-free finish. If you use disinfectant, apply it after visible soil has been removed. Disinfecting a dirty surface is less effective than cleaning it first.
Pay attention to the narrow seam where the countertop meets the sink and to the joint where silicone meets the shower tray. These areas collect moisture, toothpaste splashes, and fine dust that ordinary wiping can miss. Run a small soft brush along these lines before rinsing. This helps prevent dark residue from becoming a stubborn mildew problem.
4. Treat the shower and toilet as separate cleaning zones
Shower, tub, grout, and showerhead
Scrub shower walls and the tub with a non-abrasive sponge, working from the top down. Rinse thoroughly because leftover cleaner can leave a dull film. For soap scum, use a suitable bathroom cleaner and allow it to sit before scrubbing. Choose the product according to the surface: natural stone, acrylic, and enamel do not all tolerate the same ingredients.
For mineral deposits on a removable showerhead, secure a plastic bag filled with distilled white vinegar around it with a rubber band. Rinse the showerhead well afterward. Do not use vinegar on natural stone.
Grout needs a small brush and patience rather than aggressive scraping. If you see mildew, improve ventilation and dry wet surfaces after showering. Persistent staining or damaged caulk may require repair, not more cleaner. Adding more product will not restore a joint that is already cracked or deteriorated.
The toilet
Clean the toilet from the outside inward: flush handle, tank, lid, seat, hinges, bowl exterior, base, then the bowl. This order keeps the cleaner toilet brush and cloths away from surfaces that have already collected more residue.
Apply toilet cleaner under the rim and brush the bowl last. Follow the product’s recommended contact time, then flush if instructed. Do not forget the floor behind the toilet and the area around the base, where dust, splashes, and odors often linger. Use a dedicated cloth or brush for this zone, and never use the toilet brush on another surface.
Disinfect the flush handle, lid, seat, and other high-touch points only after visible soil has been removed. Keep the room ventilated throughout the process and never combine toilet cleaner with bleach or another cleaning product.
5. Finish with the floor and choose the right routine
Vacuum or sweep again if needed, then mop from the farthest corner toward the door. Use only a lightly damp mop on floors that are sensitive to excess water. This final pass removes dust and residue that fell during cleaning without making you walk across a damp, freshly cleaned floor.
Replace towels, refill soap, empty the bin, and leave the shower curtain or door open so moisture can escape. These small finishing steps help the room dry and keep the next clean-up manageable.
- After each shower: squeegee the glass, rinse the walls, and ventilate the room.
- Weekly: clean the sink, toilet, shower surfaces, mirrors, counters, and floor.
- Monthly: wash the shower curtain or liner if suitable, clean grout lines, descale fixtures, and wipe vents and baseboards.
- Every few months: inspect caulk, clean behind storage items, and address hard water buildup before it becomes difficult to remove.
A regular routine is not about making the bathroom look perfect every day. It prevents soap scum, moisture, and mineral deposits from turning a quick weekly clean into a long deep-clean session. The key is to remove dry dust first, use the right cleaner for each surface, and leave the floor until the end.
{“@type”:”Article”,”@context”:”https://schema.org”,”headline”:”Clean Your Bathroom in 5 Zones Without Spreading Grime”,”inLanguage”:”en-US”,”description”:”A bathroom is easier to clean when you follow a clear order: remove dry debris first, let products sit on areas with buildup, then work from cleaner surfaces to dirtier ones. This…”}
Related guides to continue
To build a stronger understanding of this topic, continue with these related guides from the same site. They cover nearby decisions, maintenance points and practical details that often influence the final result.